Tuesday, 7 August 2018

Before & After Photos Part 2

As promised here are the remaining before and after photos and a sneak preview of our new project, which is actually starting to move at pace so I have some catching up to do.  However, if you're interested there are some photos on my instagram account @debs_padstow_cottages so feel free to pop over and follow the progress on there too.

I thought I'd start with the stairs this time.  As you will recall if you've been following the previous posts we took the original stairs out, turned them around and completely re-configured the upstairs by moving the landing.  This allowed us to take the space that had been allocated for a large landing into the front bedroom and make a small en-suite.

 This is what they looked like before, rickety, dark and a little unpleasant.


  And now they look like this:


 We decided that it was more important to have an en-suite in each bedroom to give people privacy rather than maintain the family bathroom which was already there.

The back bedroom was full of pine wardrobes and was fairly okay as it had been added in the 1980's so was structurally sound, and the family bathroom was next door with it's lovely Pampus green suite!


It was extremely uninspiring so we gave it a bright white airy feel as the pictures show below (they're not the best but give you an idea), although after a year of using it I'm about to have the headboard wall, papered in a pale blue Sanderson Seagull print which should add a bit of warmth. 


Here are the ensuites, very similar but one has a window in it and the other a large mirror to reflect the light and they have different floor tiles.


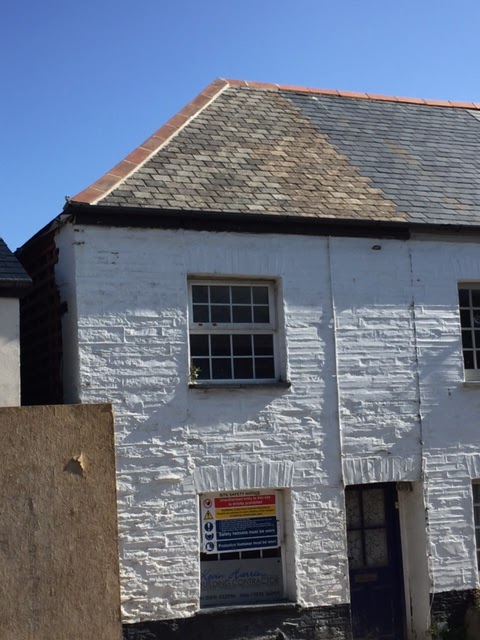
The front bedroom also had a lovely set of pine wardrobes (there was a lot of orange pine in this house when we bought it : )). 

The aim was to make both rooms have their own character so we exposed the beams in this room and added a feature wall with the final addition being the shutters which were fitted a few months ago.


And here is the space we took from the original landing looking down towards the window (en-suite is on the left) with paper blinds and then with the shutters fitted.


So that's the final post on Padstow, as it's now affectionately called, but it's not the end of our story as we have now embarked on Padstow 2 and this is what it looks like from the front. 


I'll be writing another blog over the next few days showing you the interior before we started knocking it around : ).

This time we will be letting it, hopefully for the 2019 season, so if you follow the renovation and then would like to go and see it for yourself you'll definitely have the opportunity to do so and we'd love to welcome you to Padstow which as you know is very close to our hearts.

Thanks for taking an interest in our journey so far and I hope you'll enjoy the continuing saga of our renovation projects.  Have a lovely sunny day!

PS.  I really tried to get these photos to sit in pairs which they did in draft but as soon as I published it they reverted to single images.  If anybody can tell me how to change the margins I'd be eternally grateful.

Tuesday, 17 July 2018

Before & After Photos Part 1

OMG it's been such a long time since I posted anything on our cottage in Padstow and whilst it's still not totally finished it's almost there and we are starting to enjoy the fruits of our labour, well ours and the builder, electrician, plumber etc.

The only thing we are still working on is the garden but this has been sidelined for a while for a new project (more about that later), although I did buy some planters and plants to try and make it look a little more attractive and welcoming to sit in, especially as we've had some amazing weather this year.

Meanwhile, I realised that I hadn't done a final post showing what the cottage looks like now, fully furnished.  I've therefore included some before and after photos to show you the journey our little cottage has been on.

I'll start with a photo of the front which is the cottage I  first fell in love with and knew immediately I wanted to buy. Not so for Mr M who I think so eloquently said "It's a nut job, why are we even looking at it?" He's since had time to eat his words as I hope you can see from the after photo below.


When we first walked through the door this is what we saw.
And now it looks like this! We took the stairs out and turned them around and these now occupy the opposite wall along with a TV and console table.  To the left of the sofa is an oak cupboard which we took the back off to hide all the electricity fuse boxes but which now doubles as a shoe cupboard to reduce clutter.
This footstool gives us additional seating (you can actually get 2 people on it) and is a great place to plonk your bum whilst changing your shoes.  The shutters have only been in for a couple of months but they finish everything off and give us some privacy in the evening instead of us relying on some black paper blinds which did the job but were pretty unattractive.
And finally (for this post) the kitchen.
Which has been transformed to this....
There used to be a loo in the corner which whilst I'm sure it would have been handy, has had to go! Excuse the pun : )  We also managed to find room for a drop leaf table & 2 chairs but I also have a couple of collapsible stools which fit neatly down the side of the fridge, which means we can cater for four people. It's all about being compact in such a small space.
And this is the view from the lounge looking out of our fabulous bi-fold windows onto the back yard (not so fabulous) which as you can see still needs some serious work.
I'll leave it there for this post and I hope you've enjoyed the before and after photos.  I'd also like to thank you for joining us on our renovation journey and hope you will continue to do so when I reveal our next project which I'll update you on next time along with more photos of the bedrooms, bathrooms and back yard.  Until then enjoy this amazing run of sunny weather and I'll be back soon....promise!. 

Friday, 17 November 2017

Suppliers and Finishing Touches

Well we are nearing the end of our refurbishment journey and what a journey it's been.  We've had our challenges but overall it's been a really positive experience.

Before I post the final pictures I thought it might be helpful to list some of the suppliers I've used and places I've sourced for the internal fit out and furnishings.

I decided to paint most of the rooms white and chose White Glove from Crown's Period Collection in a matt finish, however for the kitchen units we used eggshell which gives a washable and durable finish.

To give the white kitchen units a backdrop I chose a dark grey/blue called Denim Drift from Dulux,

                                 Crown White Glove Emulsion - Homebase £18 for 2.5litre
                                             Dulux Denim Drift - Homebase £19 for 2.5litre


Downstairs we opted for underfloor heating and therefore went for oak flooring with an oiled finish which has a matt appearance.  We sourced this from BSL Build Supplies just outside Padstow http://www.buildsupplies.co.uk/.

Upstairs we chose carpets and decided to go with a national retailer Carpetright which it turns out was a good decision as we ended up choosing and buying them in Birmingham, sourcing them from Bodmin and getting the fitter from Truro, all to ensure they were laid on time.


As these were the last things to go down it felt like a real luxury when they arrived, having lived with gritty and painted chipboard floors, which when barefoot in the middle of the night are not the most pleasant things to be walking on. The picture below is of the stair carpet, unfortunately I've deleted the bedroom carpets which are pale grey.

Lighting was a major decision as we wanted a soft ambience with the option of bright lights when needed.  Spots were a necessity but I didn't want them to be the main source of light so decided to go with some wall lights and lamps too.

In the living room I chose these chrome and glass wall lights which when paired with a vintage squirrel cage bulb have exactly the vintage/modern look I was hoping for.


                                                  These range from £20-30 each on ebay

Upstairs we have mainly ceiling spots along with bedside lamps which I managed to get at a considerably discounted price in one of my favourite shops TK Maxx.

The bathroom mirror lights were bought online and again offer a touch of vintage to fit in with the patterned floor tiles and retro sinks that I chose.  The ensuite tiles were bought from Topps Tiles along with the Metro shower tiles and we were given some great advice and guidance in their Kings Heath store. 


This is the overall look White Metro Tiles from Topps Tiles
                                         Berkeley Blue Floor Tiles £67.95 per square metre
York Green Floor Tiles £67.56 per square metre


The white headboard and bedside tables were again bought online from Bentley Designs and we supplemented them with a tall chest of drawers from Cotswold Company as we couldn't get the right size from Bentley Designs to fit the small space available.

In the front bedroom we went for a more traditional look with an iron bedstead but again mixed in the modern lines of a shaker style wardrobe and bedside tables from M&S.

Bentley Design Hampstead Headboard - Oak Furniture Solutions £124 
Bedside Tables £149 each


                            M&S Hastings Triple Wardrobe £499  & Besdside Tables £129 each

The sofa and chair in the lounge were bought as ex-displays from Laura Ashley at a significantly reduced price and the console table came from Dunelm.  Pictures of these will be in my next and final blog.

Pulling the look of the cottage together has been fun and I've loved every minute but there were times of indecision and worry about whether it would gel together and there's always the dread of an expensive mistake, but all in all I'm really pleased with the end result.

We still have some finishing touches to add such as shutters and blinds, mirrors and pictures but the finishing line is in sight and I feel that it won't be long before we can simply arrive in Padstow and enjoy the cottage rather than having to work on it. 

Until next time....

Tuesday, 1 August 2017

The Kitchen's Journey

When we bought the cottage seven months ago the kitchen, like the rest of it was pretty dire and if you've been following this blog you might remember that it even came complete with it's own loo in the corner!


Since then we've removed everything you can see in this picture, along with the sloping roof which wasn't taken down when the 1980's extension was built, despite there being a ceiling above it.  The upside for us is that we now have a lovely high ceiling which gives the room a much more airy feel. We also demolished the stud wall on the adjoining wall and gained about 200ml in length so the room was getting bigger by the day.


This is work in progress but by taking down the end wall we've been able to insulate and sound proof it which we've done throughout the cottage as the wall is only 4 inches thick and also it will make it much warmer, especially as we have under floor heating downstairs.

To bring in more light our builder Kev suggested we had bi-fold doors in the back wall which I resisted for a long time as I wanted windows, but eventually he talked me into it and I'm so glad he did. They have made such a difference to the whole space and light now pours in, or rather it will when the box that's leaning up against it is removed!


Because we knocked out  the wall to make the opening for the doors we decided to re-tile and re-rendered the back wall which has really smartened it up and it awaits a coat of paint to complete the look.

The scaffolding has eventually come down so we can now get the full effect of the beautiful local Delabole slates which we used to match the roof.


Once the doors were in we could eventually start to fit the kitchen and whilst it still isn't finished I think you'll agree it's a huge improvement on where we started!


For the floor we  decided to go with engineered oak which looks amazing and I'm delighted with the overall effect.  The kitchen was bespoke and came from Preston Bissett Cabinets in Nottingham and you can contact the very talented Pat McCluskey on 0115 950 6291.

Dave, our friend and decorator is coming in next to start the finishing touches and I'll report on his progress next time.  Until then enjoy the rest of the summer and you never know I might bump into you in Padstow if you visit.


Thursday, 13 July 2017

Retaining Original Features & Creating Some New

Since buying the cottage we have taken walls down, floors out, windows, stairs and doors, in fact we have pretty much taken every thing out apart from three walls!

The beautiful walls we exposed were too badly damaged to repair and insulate so we had no option but to board and skim them, all apart from a section at the top of the stairs which we have managed to salvage (although it does still need pointing).


Therefore we have had to get creative when putting back and adding some features to give it back it's original charm and character.

Firstly, we decided to raise the ceiling in the front bedroom as this is the old part of the cottage, this in turn allowed us to expose the original beams.  We then sandblasted them to get rid of the dark brown colouring which had occurred over time, sanded and sealed them to bring out the beautiful wood underneath.


We also replaced the beams downstairs as the originals weren't long enough once the wall had been taken down and rebuilt and so we decided to raise the ceiling downstairs as well.


The upstairs beams add a lot of character as they traverse the landing, bedroom and en-suite and alongside the original stone wall we salvaged, it's starting to regain it's charm.

We also exposed the wood above the windows and gave these the same treatment as the beams.


Because we couldn't retain the original walls we really wanted to have a feature that was as close to the original as possible, so we managed to source some split faced slate tiles from Marble Mosaics which you can see here http://bit.ly/2ujYWyI  These have been an amazing success and we are really happy with the end result.


Next time I'll focus on the kitchen as I'm conscious it hasn't featured for a while and I think you'll see a big difference.

Have a great July!

Tuesday, 6 June 2017

Resurrection of the ceiling and internal walls Part 2

I wanted to start this blog by introducing you to our builder Kevin Harris and his fantastic team.  If you're looking for a builder in the Padstow / North Cornwall area I can definitely recommend Kev and if you're interested in contacting him, here's his number 07875 760109.


Here he is looking a bit war torn after slate hanging the gable wall.....a man of many talents!

From the very beginning Kev has given us fantastic advice, guided us when required and is always  a calming influence which when you are demolishing 25% of your house is an important attribute, believe me.

Kev also re-tiled (slated) the roof which made the building watertight and whilst we had to use the original tiles where possible the rest were reclaimed, including the ridge tiles which look amazing. 


So last time I focused on the resurrection of the outside wall, whereas this time I want to show you the inside.  

After the barn like cavern that we encountered when we were here on May Day, this time it was great to see some structure being put back and some definitive rooms starting to take place.  We even have a ceiling in the lounge, complete with beams and the 'piste de resistance' is the new staircase.  I can't tell you the sleep I've lost over whether it's going to be too big and dominate the lounge, but once again I should have listened to Kev and trusted that he knew what he was doing.  Sorry Kev, I'm learning as I go along.


We have turned the staircase round in order to open up the lounge and I think it's worked.


And this is the view from the landing!


The outline of the ensuites are also in place and I'm assured the toilet will be on the inside when they're completed 😊.


Both will have pocket doors that slide into the wall to save space in the bedroom, another suggestion from Kev.


Next time I'll show you the beams we've exposed and how they look after being shot blasted along with the other features we're retaining. The windows should also be making an appearance soon and lots of decisions need to be made in the next few weeks, which as we are going on holiday for 2 weeks soon is testing my organisational skills.

Let me know if you have any observations or suggestions, all are appreciated and welcomed!

Tuesday, 23 May 2017

The Resurection of the Wall & May Day Madness! Part 1

Well, It's been a busy old time recently including a holiday  to Spain with my Mum & Dad and a couple of trips to Cornwall, one for Easter and another for the infamous May Day celebrations.

If you've never witnessed May Day it's a sight to behold and one I would highly recommend as it's an ancient fertility festival which is celebrated every year on the 1st May.  Here's a photo to whet your appetite.


This is the  'Obby Oss' of which there are two, and they spend the whole day dancing around the town with a crowd of followers occasionally meeting at the Maypole.  You really need to go and witness it for yourself.

Anyway back to the cottage, which is really starting to take shape. We now have four walls and a new roof making it watertight which is a relief, however, on our first visit at Easter we had lost the first and second floor ceilings which gave the main building the appearance of an old barn.


With no stairs we could only access the back bedroom via these ladders which were a bit scary for us non-builders,but it gave us a birds eye view of the property and enabled us to see how far the new staircase would encroach into the lounge. 


We are keen to keep the space as open as possible as it is a narrow room and otherwise could feel small and cramped.

We were very excited about the wall going back up as this had been the most difficult part of the whole project and were relieved to see it back in situ, doing its job holding the roof in place : ).
The main construction is made of wood placed on blocks but the external wall will be hung with local slate tiles and I'll show you the before and after pictures when we go down at the end of May.

Inside, the other internal walls are really interesting and appear to have a medieval look about them.  They've been constructed using a wooden frame filled with slate downstairs and brick upstairs.  It would be interesting to know whether the original building had only been one storey or whether the top floor ran the full length of all three cottages?  I would have loved to have kept them as a feature but the work involved in making them good was too expensive.


And finally here's John surveying what's left of his investment!


In part II of this post I'll introduce you to our fabulous builder and show you the new roof and how we are trying to bring back some character to this charming old building.  Until then have fun and please do leave any comments or questions which I will happily answer.